The following is a relatively quick and simple, but very important task for anyone owning or operating a Hologic Discovery Series bone densitometer. This procedure ensures that your Discovery is operating at a level consistent with FDA and manufacturer standards for diagnostic quality and patient safety. This test should be run each day before any patient scans are performed.
How to do a daily qc test for a hologic discovery
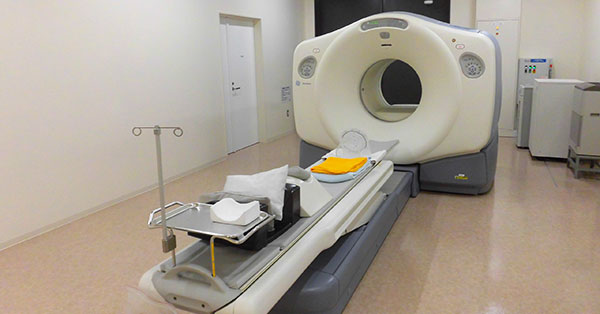
In the bottom left corner of the main menu screen click the button labeled “Daily QC”. This will activate the laser aimer on the arm of the table.
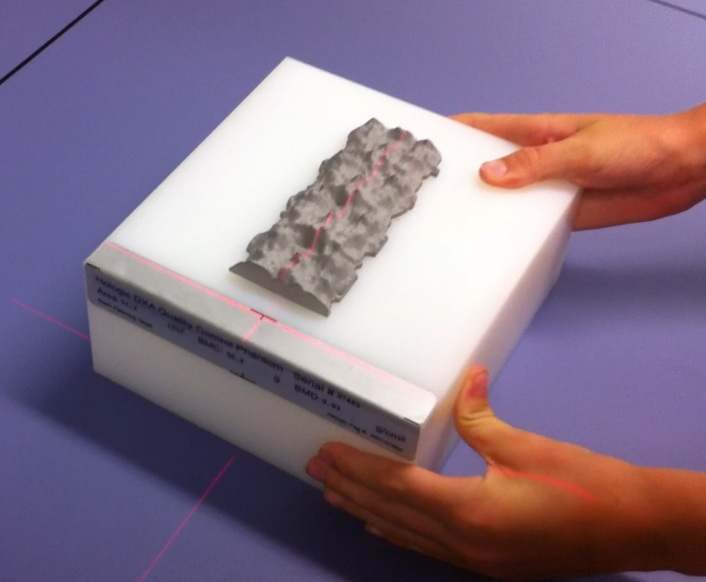
Place your acrylic QC phantom on the table. On newer Discovery models, this phantom is a white block with a grey ridge on it like a mountain range on a relief map. On older units, it is a clear block with a section of a spine in it.
If you have the newer phantom, face the black hash mark on the phantom toward the foot of the table (left of table-side control) and align the phantom with the beam of the laser aimer so the axis of the hash mark running perpendicular to the grey ridge is directly under the axis of the beam that runs the width of the table.
If you have the older phantom, place the phantom on the table with the black cylinder (white circle on top of it) towards the foot of the table (left of table-side control). Take care to align the red cross-beam laser in the middle of the white circle.
After your phantom is in position, return to the computer and click on the “Continue” button. This will begin the test, which takes approximately two minutes.
If your system’s calibrations are still within OEM specifications, a window reading “Daily QC passed” should appear on your screen. Within this window, click the “Plot” button.
The computer will generate a graph representing the functional parameters of the unit. There should be three lines: a dotted red line on top representing the upper limit of the function being tested, a green center line representing the mid-point between the extreme ends of the tolerances, and another dotted red line representing the lower limit of the function being tested. Click through the three tabs in the plot window; BMC, BMD, and Area, to check your results in each function.
As long as the dot representing your latest QC (this dot will be filled while older QCs will show as the outline of a green dot) is somewhere between the red dotted lines, your machine is functioning according to OEM specifications.
The Follow-up
All Discovery owners hope that their bone densitometers will pass their QC tests every day. Most of the time, this will be the case and the patient schedule for the day can proceed as planned. Unfortunately, as with any piece of sensitive equipment, there will be times when maintenance is necessary.
If you begin to notice a trend of daily QC dots consistently drifting further from the center line, you’ll want to mention it to your service provider and schedule a calibration service call soon. If your system fails its daily QC outright, you’ll need to call your service provider immediately before you can move forward with your patient load.
If you have questions about your QC results, the Discovery Series, or bone densitometers in general, Block Imaging has trained professionals on staff that can help. If your QC results are starting to shift, don’t wait until your system is completely down to ask an expert!